
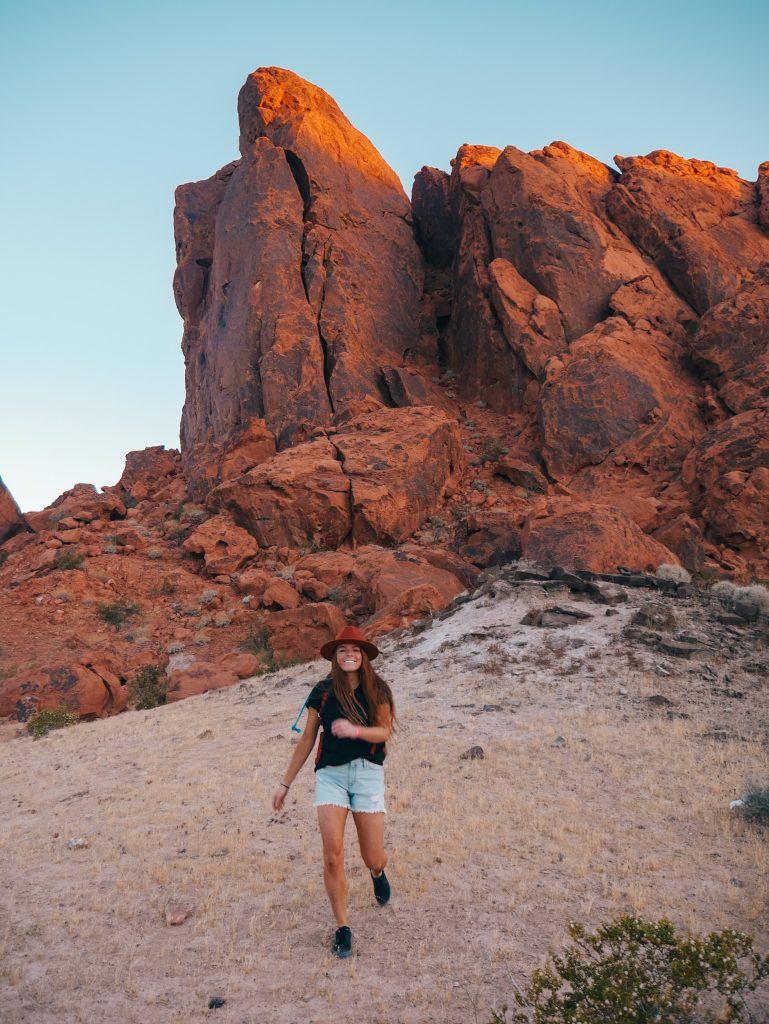
Out of the vast stretch of plain, beige desert around Las Vegas jut the vibrant rocks of Valley of Fire State Park. This park is an absolute must-see if you are around Vegas. The area truly blew our minds, and we wish we had more than a day to explore it. Thankfully, the park is not too big, it’s easily drivable, and is packed with activities, making it easy to plan a quick stop for a couple hikes, a multi-day camping trip, or anything in between. Following are the incredible places we visited during our day in the park.
Before You Visit
Here are a few things to keep in mind while planning your visit to Valley of Fire State Park.
- The Weather: It gets really hot here in the summer (over 100˚F). We went in the middle of summer and, even though we were used to living in the Arizona heat, it still felt pretty brutal at times. We planned our hikes with time to enjoy the air conditioned car and plenty of water in between. On the bright side, the heat left the park a lot less crowded than it is during cooler times of the year.
- Rules & Regulations: When exploring the park, do not take any rocks, vegetation, or artifacts with you. Leave nature as you find it (or better). We saw some names carved into the rocks around the park. Don’t be that person.
Pets are allowed in the park, but must be leashed. Drones are not permitted. Camping is allowed in designated campgrounds. Visit the Valley of Fire State Park website for more information on camping.
- Wildlife: Scorpions, snakes, hornets, and more can be found in the park, so keep an eye out for the ones you don’t want an up-close encounter with, especially when climbing among rocks. There are other really cool animals that make the park their home, including big horn sheep, owls, coyotes, and badgers! Wildlife is typically more active in the early mornings and evenings.
- Amenities: There is a visitor’s center at the beginning of Mouse’s Tank Road that has souvenirs, restrooms, and information on the park. There are also restrooms at a few of the trailheads. The visitor’s center sells some food and bottled beverages, but we recommend packing your own lunch or snacks and eating out on the trail!
Getting to Valley of Fire State Park
Valley of Fire lies off I-15 an hour northeast of Las Vegas. We left Vegas around 4 a.m. to get there for sunrise. We took exit 75 onto Valley of Fire Freeway, but you can also take N Moapa Valley Boulevard towards the park if you are heading down I-15 from the opposite direction.
It costs $15 to enter for out-of-state vehicles, which can be paid at the entry gates at either end of the park. Leave your ticket displayed in your vehicle. The visitor’s center is pretty well marked and sits near the start of Mouse’s Tank Road.
Our Valley of Fire Itinerary
After spending a day in Vegas to visit Red Rock Canyon, we only had the second day of our trip to explore Valley of Fire before driving back to Phoenix after our hikes. It is definitely possible to see quite a bit of the park in a day trip, but it is a good idea to plan your stops beforehand if you intend to do so. We made several great stops in the park that we will detail below.

The Fire Wave & Pastel Pink Canyon
Info: 3 miles for Fire Wave & Pastel Pink Canyon Loop, 1 hour, easy hiking
We drove down Mouse’s Tank Road away from the visitor’s center just as the sun was beginning to light up the sky. We parked for the Fire Wave on the left side of the road in a large dirt lot near the trailhead. The trail to the fire wave begins on the east (right) side of the road.
The morning air felt pretty nice as we followed the sandy trail down the hill. Soon, the trail became slick rock, making the path not as clear. Though it’s not incredibly hard to figure out where to go, we recommend downloading Google Maps or AllTrails for the area because everything in the park is pretty well marked on there. After walking south on a red rock slab, you’ll see the Fire Wave.

As we came over the hill, the top of the formation was illuminated in the morning sun. It was absolutely stunning and we had the place completely to ourselves. We read that the Fire Wave is much better at sunset for lighting’s sake, but we were still blown away by it in the warm morning sun.
From here, you can either head back the way you came, or head to the wash just south of the formation. Follow the wash back towards the road, and you’ll end up in Pastel Pink Canyon. This place was also so beautiful in the soft morning light.

Pastel Pink Canyon will end right beside the road, where you can follow the road back up to the trailhead. Our next stop was accessible from this same parking lot.
Thunderstorm Arch, Crazy Hill, & More
Info: Half a mile ish, 30 minutes to 1 hour, easy
We dropped off the hillside from the Fire Wave parking lot (Lot #3) and headed south. This part of the Seven Wonders Trail drops fairly quickly into a wash. It wasn’t well marked at all, so we were kind of just exploring around the cracks and crevices looking for small arches. Again, this is where GPS comes in handy. Google Maps didn’t show these arches, so we looked into it as best as we could and and dropped some pins before our visit.
Here are our coordinates for each arch:
Fire Cave: 36˚29’10.8”N, 114˚31’47.8”W (36.48633, -114.52994)
Thunderstorm Arch: 36˚29’09.0”N, 114˚31’50.0”W (36.485833, -114.530556)

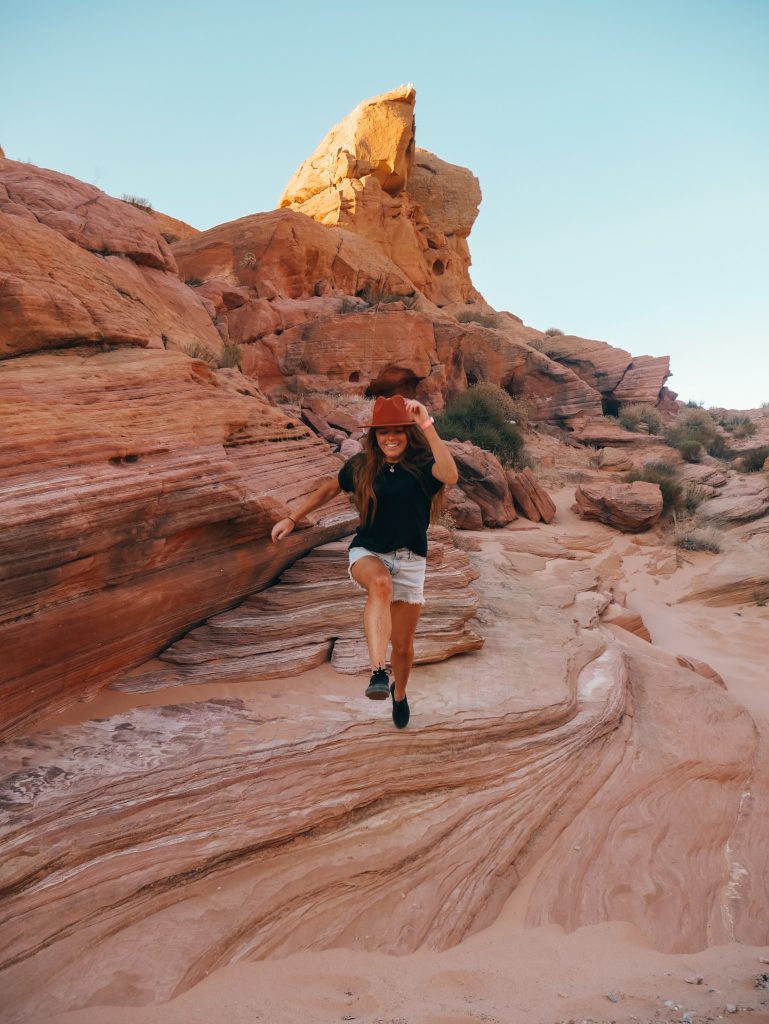
We ended up hiking up a bit too high on the hillside and had to climb down a bit further into the canyon. We found the arches on the more western-facing sides of the rocks. First, we came to what we thought was called the Fire Cave. However, we aren’t sure that this is its official name because Windstone Arch is also called the Fire Cave. Anyway, the early morning was a great time to be there for photos, as there was no harsh light hitting the arch.
We hiked a very short ways south and came to Thunderstorm Arch. The markings on the arch almost looked like a painting! From here, the Seven Wonders Trail Continues to Crazy Hill, which is a bright, pastel-colored dome. The trail continues beyond this; however, we were planning on driving to the White Domes trailhead to hike that area next, so we hiked back up the hill to the parking lot.

White Domes
Info: 1.2 miles, 30 minutes to 1 hour, easy to moderate (sandy with one steep section)
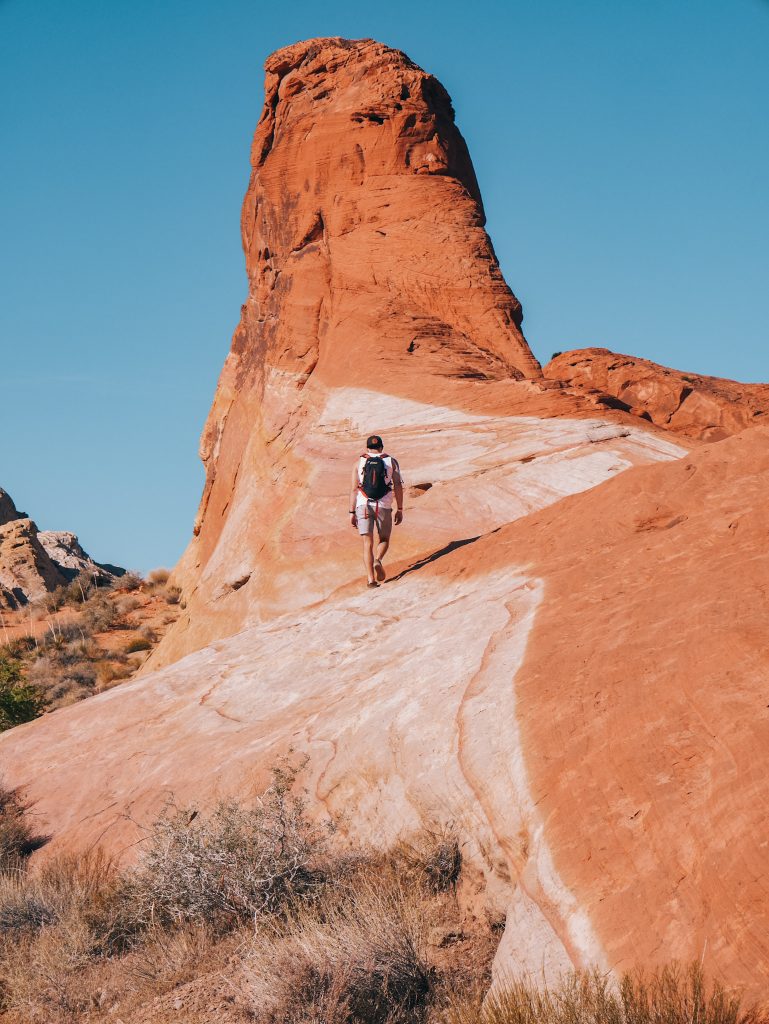
Follow Mouse’s Tank Road until it dead ends at White Domes Trailhead. This large paved parking lot has restrooms and a few picnic spots. Again, we were the only ones there. White Domes Trail is a loop that we recommend doing clockwise because there is quite a steep and rocky drop near the parking lot. That way, you climb down this steep part and up the far side of the loop that inclines a lot more steadily.

Right from the start, the views were beautiful. We were surrounded by towering white rocks with a distant view into a valley. We hiked down the steep, rocky section, which was pretty well maintained with rock steps put in place. The trail flattens out in a valley where you’ll come across some “ruins” that were part of an old movie set. Quite a few movies were filmed here!
The next part of the trail leads through a short slot canyon. It gets pretty narrow, but you aren’t required to climb or squeeze through cracks like in some of the slots in Utah! The slot opens back up into a wider rocky canyon that you’ll follow back up to the lot.

We thought we had hit the highlight of the day after seeing the Fire Wave, but we had so much fun exploring the White Domes area. In our opinion, it was equally as beautiful. It was also great that it included a lot in a short loop, from the movie set and valley views to the slot canyon and unique rock formations. Definitely don’t miss this one!
Mouse’s Tank Road Viewpoints
Info: About a ½ mile (depending on where you stop and how far you walk at each viewpoint), 30 minutes to 1 hour, easy
The drive down Mouse’s Tank Road is stunning, so we decided to make some stops on our way back out from White Domes. First, we stopped at the Fire Canyon/Silica Dome viewpoint. After seeing the view, we were bummed that we didn’t have more time to hike into the depths of the canyon. It was so windy at the viewpoint, but it felt refreshing in the heat.
The road drops into a valley surrounded by tall red rocks. You’ve probably seen this road many times in photos because it is an iconic “Instagrammable” spot. We stopped at a couple spots along the way. The road is narrow and there isn’t any official parking for some of these viewpoints, so we were lucky that the park was quiet so we didn’t have to circle back or wait to find a spot to pull off the road.

Rainbow Vista
Info: 1.5 miles (including walking down to the Fire Canyon overlook), 30 minutes to 1 hour, easy (some pretty sandy spots)
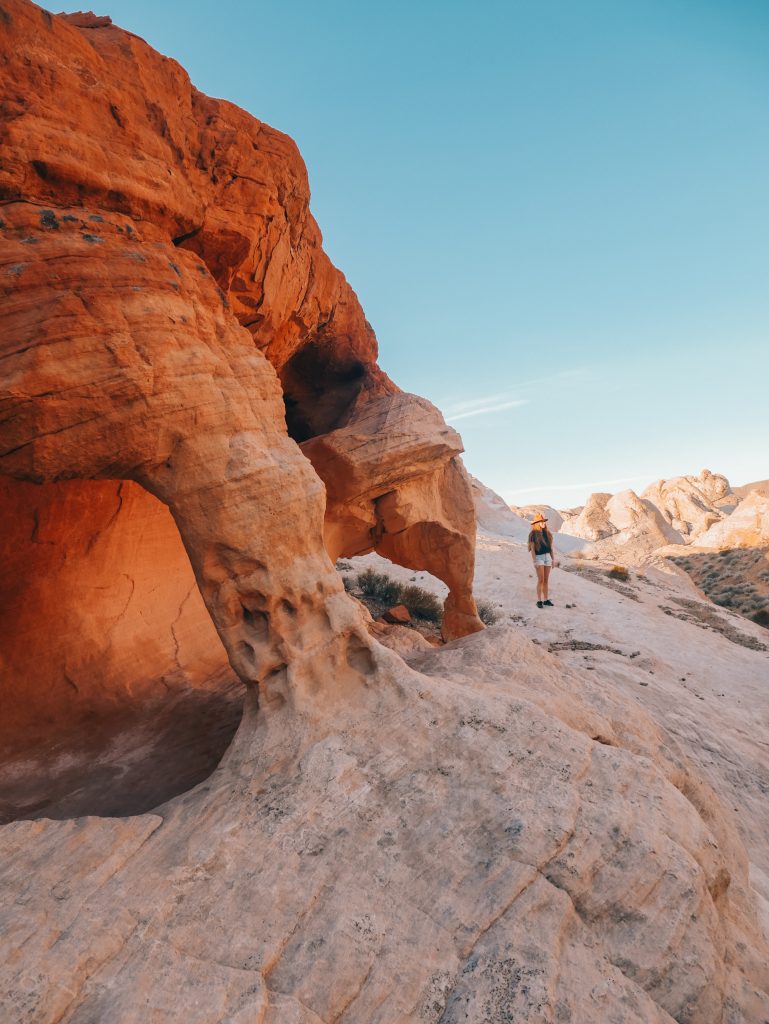
Rainbow vista is a quick hike through some colorful rock formations. You’ll see some pretty landscape where the rock abruptly changes from ivory to red. There is little shade along this sandy trail, so take plenty of water! Depending on the time of day, you can find some relief from the sun in the shade of some of the rocks. There is a spot that allows you to continue down the hill to another Fire Canyon viewpoint. It was beautiful and worth it to add less than half a mile to the walk.
There are restrooms and some picnic spots at this trailhead.

Petroglyph Canyon to Mouse’s Tank
Info: 0.8 miles, 30 minutes, easy (but deep sand makes the going slow)
It was really hot by the time we started hiking Petroglyph Canyon, so we were glad that the hike was pretty short. The sandy trail winds through a scenic red rock canyon. Keep your eyes open for petroglyphs on the walls throughout the hike. Please do not touch them.
The canyon winds towards Mouse’s Tank. You won’t really see it until you’re on it as it is a small drop tucked in some rocks that have been smoothed by water flow over the course of many years. In the middle of summer, the “tank” held a little water while the surrounding area was bone dry. Bees were swarming around it, so we didn’t get too close. After admiring the formations and petroglyphs in the area, we headed back up the trail the way we came.

Atlatl Rock Area & the Beehives
Info: About a ½ mile, 30 minutes to 1 hour, easy
We drove back out past the visitor’s center and took a right back out onto Valley of Fire Highway. Soon, take a right onto Campground Road towards Atlatl Rock. A couple campgrounds sit in this area and this is a popular stop, so there are plenty of parking spaces, shaded picnic tables, and access to restrooms.
You can take a quick hike up Atlatl Rock via the metal steps that climb up the side. This gives a pretty view over the desert towards the distant red formations of Valley of Fire. There are also some petroglyphs at the top.
We continued around the Campground Road loop after visiting Atlatl Rock. There are a few sights here, including Arch Rock and Windstone Arch, each of which is easily accessible or visible from the road.
When you get back to Valley of Fire Highway, turn left to get to the Beehives that will quickly appear on your right. This isn’t really a hike, but more of an area to wander with some cool rock formations. The name of the area is very fitting because the rocks really were shaped like beehives. Some even had little caves that you could go into!

Elephant Rock
Info: 30 minutes, easy
We drove down Valley of Fire Highway towards the other entrance to the park. Just near the entry gates sits the small parking area for Elephant Rock. When we got there, a group of vans and their passengers were just beginning the hike, so this was the only busy spot we encountered. You can see the arch from the road or hike up to it if you want to see it up close.
After seeing Elephant Rock and enjoying our packed lunch, we made the drive back to Phoenix.
Like this Post? Pin it!
