
Olympic National Park is packed with incredible mountain views, and hiking up Mount Storm King doesn’t disappoint. This hike includes picturesque mossy forest, a fun climb using ropes, and sweeping views of Lake Crescent as a reward. This is a pretty popular trail, and we can see why! Despite its popularity, we definitely recommend hiking this trail if you find yourself on the northern side of Olympic National Park.
Getting to the Mount Storm King Trailhead
The trail to Mount Storm King begins from the Storm King Ranger Station on the shores of Lake Crescent. Turn off Olympic Highway (the 101) onto Lake Crescent Road and park near the ranger station. Follow the path by the ranger station and cross under the road via a small tunnel. When you exit the tunnel, you’ll find yourself among the trees on the path to Mount Storm King.

Fees
A pass is required to hike in Olympic National Park. It is best to purchase your pass online beforehand. An Olympic National Park basic pass is $30 for a private vehicle and is good for seven days. An annual pass for this park is $55.
Alternatively, you can purchase an America the Beautiful annual national parks pass for $80. Ours had just expired, so we picked ours up along with a bear canister at the REI in Olympia before our excursion into the park.
Hiking Mount Storm King
Hike Overview
Hike Type: Challenging out-and-back trail
Distance: 4 miles (6.4 kilometers) roundtrip
Elevation Gain: 2,065 feet (629 meters)
Duration: 2.25-3.5 hours round trip
Regulations: Pets and drones are not permitted. Please don’t feed the wildlife
The Trail
We woke up early with the intent to leave our hotel in Port Angeles and begin the Mount Storm King hike around sunrise. We were one of the only cars in the parking lot near the ranger station when we arrived. The beginning of the hike was flat and we were in awe of the beauty and peace and quiet we found among the old trees.
Pretty soon, we came to a trail on the left with a sign indicating the beginning of the climb up Mount Storm King. From here on, the trail was pretty steep. Though it was a chilly spring morning, we found ourselves shedding our layers quickly as our heart rate accelerated.

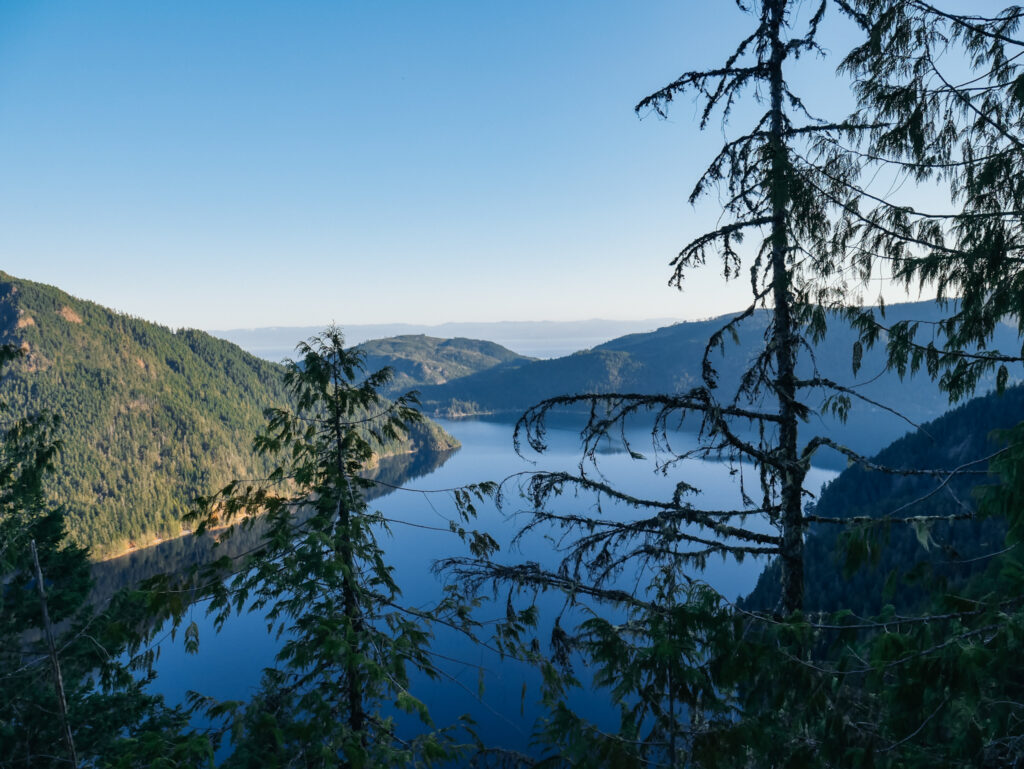
As we climbed higher, we began to get glimpses of Lake Crescent through the trees. At the top, there is a sign marking the end of the maintained trail. Most people don’t stop here! We continued up the hill and soon came to the first of several ropes. These are here to assist you as you make your way up the rocky hillside. The rope section isn’t anything too technical.
Some sections were steeper than others, and some spots were rocky while others were loose gravel. Note that the National Park Service emphasizes that the ropes and the trail beyond the marked end are not maintained and to hike at your own risk. The path to the top beyond the “end of maintained trail” sign is short, but steep.
We enjoyed the ropes because it added a fun aspect to the hike. At the top of the last rope, there is one last short climb up some rocks to get to the viewpoint.

The Mount Storm King Viewpoint
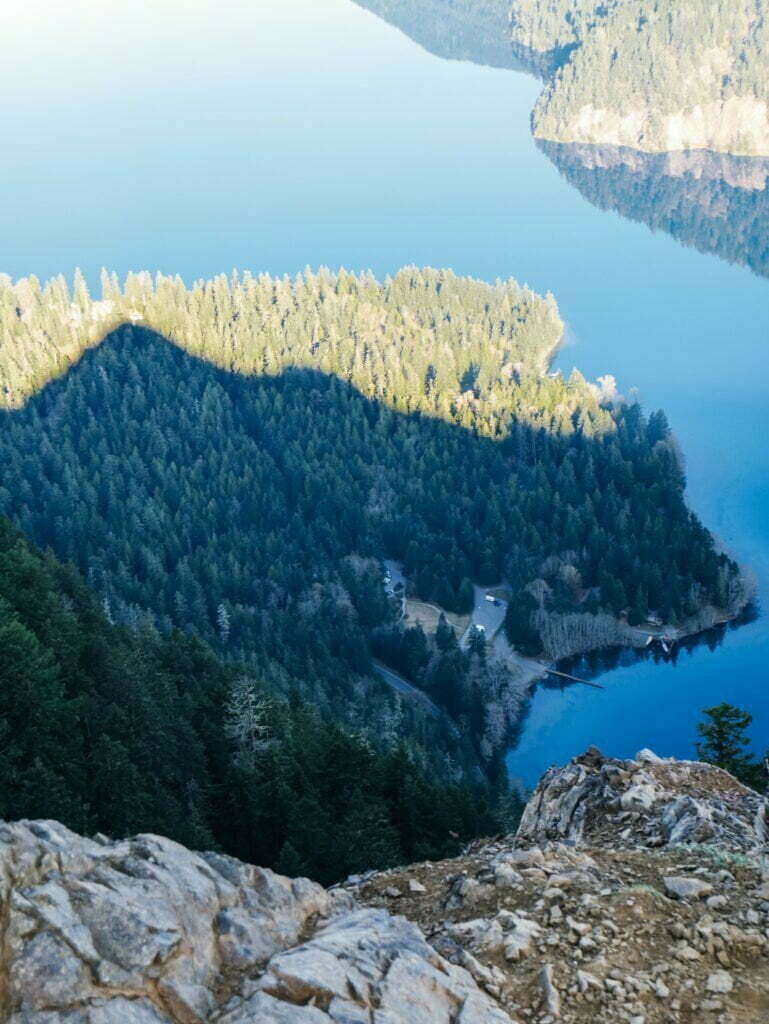
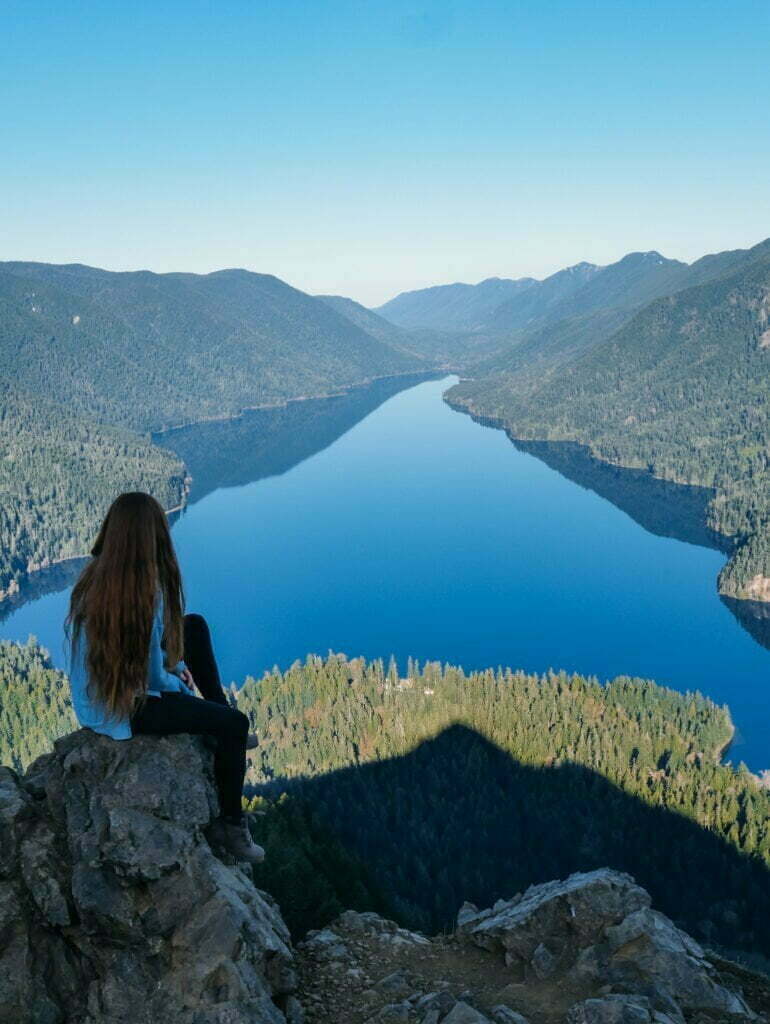
The rocky spot at the top of the ropes is the famous viewpoint that draws many people up Mount Storm King. We were pumped to be the first ones up there to get some photos and enjoy the solitude. As we took in the views a few other pairs of hikers joined us. We were told that this viewpoint frequently has a line of people waiting to take their picture on the rock at the far ledge. There isn’t a ton of space up here for crowds to hang out.
The sun still hid behind a peak, casting shadows over the viewpoint. Something to keep in mind if you’re a photographer – the morning light can be a bit harsh over the lake in the morning. This is a much more popular spot for photographers near sunset when the light is a bit more ideal. However, for us, going early was worth it to have the place pretty much to ourselves.
We hung out at the top for a while, chatting with some other hikers. Soon, we noticed that there was already a small line of people building up along the ropes below. We decided to head down before the trail became too busy.
Adding Marymere Falls
As you descend the mountain, you’ll end up back at the same junction you turned at before the climb up Mount Storm King. If you head to the left, you’ll make it to Marymere Falls. We highly recommend taking this little detour because it’s short, easy, beautiful, and you’re already there!
Visiting Marymere Falls in addition to Mount Storm King makes the hike about 4.8 miles (7.7 kilometers) total roundtrip.

What to Bring to Hike Mount Storm King
Water: It’s important to stay hydrated!
Passes: Bring your parks pass and display it in your vehicle.
Snacks: Bring a snack if you’d like to refuel during or after the challenging climb up.
Sun Protection: Though much of this trail is very shaded, we always recommend bringing a form of sun protection, such as a hat, sunscreen, and/or sunglasses.
Hiking Shoes: Sturdy shoes with a solid tread are important on the upper ropes section of this trail.
Gloves: We didn’t bring gloves, but some have said that they were glad they had them to protect their hands when using the ropes.
Hiking Poles: This is also something we don’t prefer to use, but some may find it helpful on the way up. Poles that collapse and attach to your bag or fit in it are best when you need both hands for the ropes.
Small First Aid Kit: We like to carry one of these in our bags for any hike, especially those that require a bit of scrambling.
Layers: Even in the summer, mornings and evenings among the mossy trees can be chilly, so bring layers. A rain jacket is a good idea since this area of Washington gets a significant amount of rain. In the winter, heavier coats, gloves, and jackets may be necessary.
Camera: You may want to snap some photos of this iconic spot!
Like this Post? Pin it!
